Tzi's Scooter
|

|
|
E-mail me
After surfing the net for several weeks I could only find one page with instructions on how a motorized scooter works and more importantly, how to make one. Only problem was that the site was "Under construction" and the section regarding the making for the scooter was missing. If your are interested, the site I found is at
http://silverstone.fortunecity.com/pantera/231/scooter/main.html
After that I went to some newsgroups and found other people looking for information or 'plans' on how to make their own scooter, so I decided to make a site for all those people out there who haven't got the money to spend on a prebuilt motorized scooter.
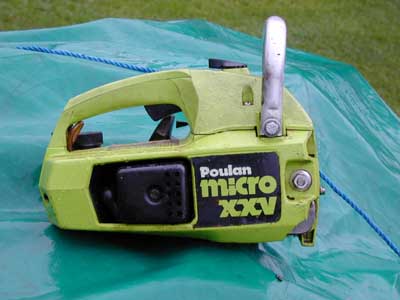
I managed to pick up a small chainsaw motor from the local repair shop for a nice price. I was lucky in the sence that the motor was relatively new, and the only thing wrong with it was the valve that squirts oil onto the chain. This is not needed for a scooter. This valve part was hard to get so the owner of the chainsaw sold it to me YAY!
The three people I know that have built scooters, have all used brushcutter motors. I am just being different. I also figured that a chainsaw would have a heavier clutch than a brushcutter. Whether that is true or not is another thing.
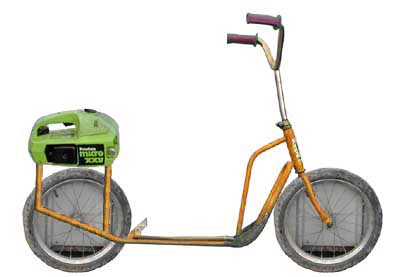
The chainsaw is a Poulan Micro XXV
I think it is around 22cc, and I know it only has a small fuel tank which would hold about 500mls if I'm lucky.
When I mount it on the scooter I will put a bigger fuel tank on it, probably 2L. We can't be running out of fuel out in the bush somewhere now can we?
 |
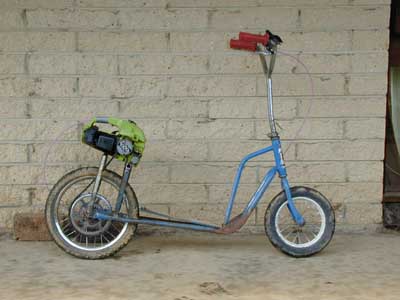
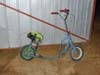
The scooter I will be using is an old 'Roadmaster Special' made by Progress Metal Works PTY LTD.
Its a childs scooter from 20 or more years ago. It will need to be reinforced some more because I have weakened the frame over time by doing 180's and bunny hops. They just didn't make the scooter for that kind of thing when it was built.
In the photo, the scooter has its original 12in wheels, but will soon have 16in's on it, or at least on the back anyway. There is about 2mm clearance between the frame and the tyre when it has 16in wheels on it.
The rear forks will be widened to accomodate the larger axle.
This scooter is only a temporary solution until I find that the motor is infact powerful enough to do what I want, and that all goes together well. If this scooter does infact go alright, then I will be making a frame from something like chrome-molly to the size that I require. The other alternative is to strengthen the Roadmaster a lot, and raise the ground clearance some more.
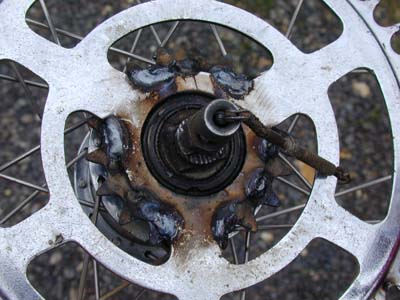
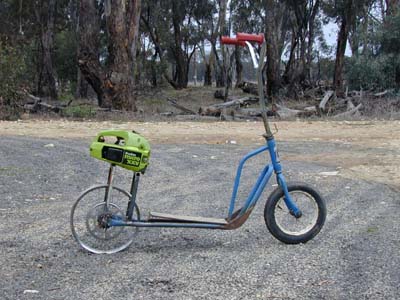
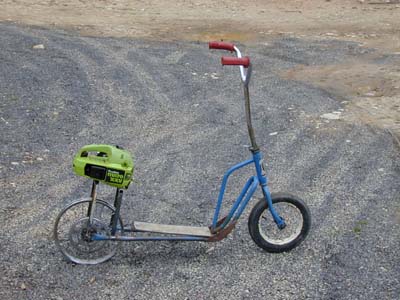
The rear wheel is a custom made 16in with heavy spokes and a 3speed Sterny-Archer hub gear.
I had it made up by Moroni's bike shop in Bendigo from parts I bought from the wrecking yard.
Welded onto the side of the wheel is a 46tooth sprocket off a 3piece crank from a full size ladies bike.
Now replaced by a 52tooth sprocket from an old racer. The more teeth the merrier!
The short life of the Green Wheel
|
|
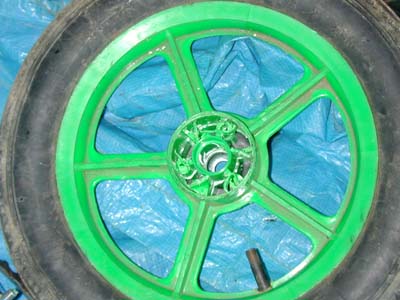
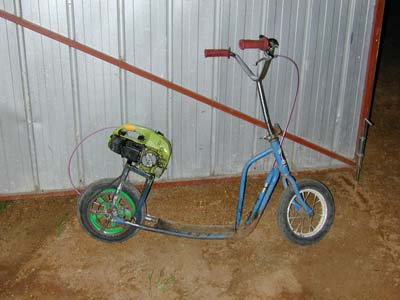
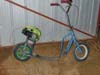
Recently I decided to try out the idea of a 12inch wheel as opposed to my current 16inch with gears. So off to the sunday market I went with the aim of returning with a 12inch rear wheel.
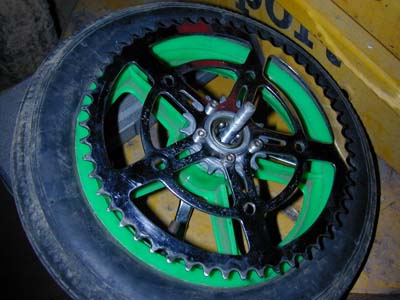
I ended up buying a lime green plastic wheel which was designed for solid tyres. I also purchased another STRONG 52tooth chainwheel.
After bolting the chainwheel (different technique this time) to the plastic wheels small sprocket, I drilled a hole for the inner-tube's valve and whacked on a tyre. I slotted the wheel in, and tightened the chain. Time for the first test run!
After spending the best part of 2 minutes trying to start the motor (hasn't been started for ages) I finally got it going. I opened the throttle and it took off like a rocket. About 100m up the road though, I heard the revs go up like the clutch was slipping, so I let off the throttle and tried again. I had the throttle wide open when it threw the chain, caught it in the wheel and stalled dead.
When I wheeled it back to the garage to untangle the chain and put it back on, I found that the sprocket was loose. On further investigation it seems though there wasn't much holding the sprocket to the plastic wheel, and it got ripped to shreds inside.
I think I will have to externally attach the 52tooth to the outside of the wheel, pinned through the spokes.
It certainly worked better than I thought, and better than the 16inch.
Although the hub got ripped to shreds, I managed to strap the chainwheel to each spoke of the green wheel with hight-tensile fencing wire, and have been using it like that for about 3 days now. I will eventually bolt the chainwheel to each of the 5 spokes in a more permanent manner.
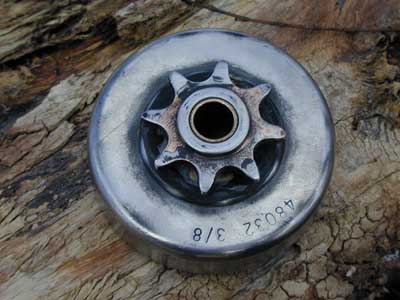
The sprocket on the motor is a 8tooth motor sprocket from a TAMI / VIZA scooter.
It has been welded onto the side of the clutch-housing (the bit the clutch spins inside) after the chainsaw sprocket was cut off.
I was hoping to be able to simply modify the chainsaw sprocket, but the distance between the teeth on the sprocket is too far for a bike chain. Its a pity, because the chainsaw sprocket was a 6 tooth which would have been a higher ratio between the rear wheel and the motor.
The first time I ran on this sprocket it broke loose from the clutch housing because of the rotational stress on it, so it was then tig welded together.
It's not going to fall apart now!
As with most things home made, they are never completed...just abandoned.
This scooter was oly ever made to see if I could actually do it before I spent lots of money making it look good.
Now that it is done, I am building a much better scooter from scratch, frame and all in an attempt to fix some of the problems that I had with this one, mainly the weak frame and gearing.
This is what I wanted this scooter to look like when it was finished. An 'artists inpression' as they say. (HA HA HA)
It was going to be painted red, or if I can find someone who sells it, the metalic orange color like the SS Commodore.
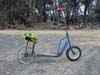
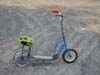
At various stages of making the scooter, I added pictures below of how the scooter was progressing.
Here are the latest

Large 1200x1600x16M picture (400k)


Large 1200x1600x16M picture RHS (413k)
Large 1200x1600x16M picture LHS (416k)
Closeup photos
Just in case anyone was wondering, Yes I did bend the frame under the deck.
No more jumps for this little scooter!