Created by Daniel McCauley, New Jersey, USA
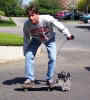
My brother, the test pilot for the intial runs.
Introduction
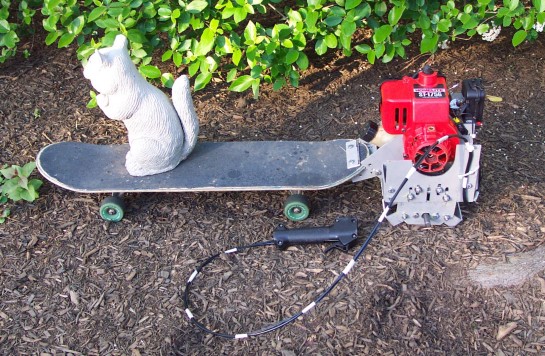
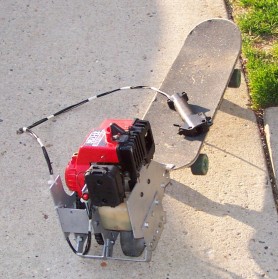
For some years, this old weedwacker I had in my basement was collecting dust until one day i had the bright idea of using it for a motorized skateboard. After lots of thinking, the demon board project began.
First Prototype
Being an electrical engineer, I didn't know much about mechanical engineering. So I started out with a system using a driveratio of 2:1. Once started, the demon board ran at a very low speed for about 50 feet then shutdown. Failure!!!! I now began design of the second prototype.
Second Prototype
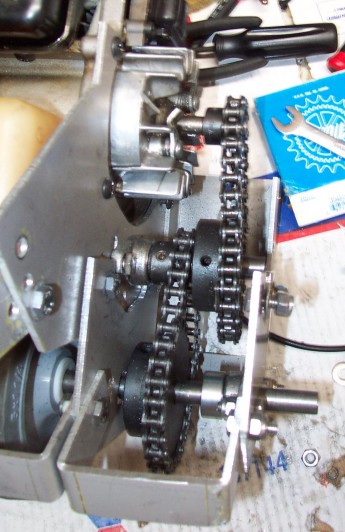
The first goal of the prototype was to increase the overall drive ration to get some oomph out of my weedwacker motor. Since my drivesprocket had to have a less diameter than the drivewheel, my selection of a drive ratio using a simple two sprocket system was extremely limited. Therefore, I had to incorporate a four sprocket system utilizing an idler shaft. This new drivetrain featured a motor sprocket of 9T with an idler sprocket of 25T. Then a 10T second sprocket on the idler shaft to the final sprocket which was 25T as well.
The drivewheel was increased from the original 3.5 inches to 5.5 inches. Overall drive ratio was now: (25/9) * (25/10) = 6.95. See the pictures below for an image of an incomplete drivetrain set-up utilizing the idler shaft.
Second Prototype Test
Well, I soon fired my brother as test pilot and took over the reigns. Since the system is direct drive with no pull-start, a second person is required to push the person on the demon board. My brother pushed me and all of a sudden i felt the motor kick in. I applied more throttle and i was now flying. Success!!!!!!!
Uh oh!!!!
Okay, one major problem that came up during the second prototype test was that I had no kill switch on my handheld control unit. And that was realized during the actual run of the prototype. So I simply jumped off the board, it crashed, and i shut it down using the onboard motor kill switch.
Prototype Three
Prototype three was originally going to be the final test. I threadlock all sprockets and everything else and retensioned all chains. I added a kill switch to the main throttle unit. The test was successful and my 165 lb brother was clocked at 30 MPH at 90% throttle. Not bad!!!! Myself at 205 lbs was clocked at about 22 MPH. Not the 30 MPH as my brother, but its still pretty fast considering you are standing on a pretty unstable skateboard.
Lessons Learned
In this section, I will briefly discuss some lessons learned from my project which should be very invaluable to others building a motorized scooter or skateboard.
Drive Ratio - Very important. Be sure to make sure your driveratio is quite large. Don't start off small like I did!!!!
Threadlock - Be sure to use threadlock on all set-screws on the sprockets, collars, etc... else you'll be looking on the ground for them when they vibrate out like i did!!!!
Kill Switch - Do not attempt to use a kill switch during riding. With a high drive ratio, the engine braking is severe enough to throw the rider off over the front of the board. I know this!!!!! This is the reason a dead man's switch isn't used as well. To stop my direct drive demon, I simply jump off and push the kill switch at the same time when I come to idle stop.
Clutch - I didn't use one - however I would recommend using one. I have no way to restart my system without a second person their to push me. The engine accelerates too fast if I try to start it myself with only part of my weight on the board while pushing. Remember, with a high drive ratio, you only need to push like a foot or two to get the thing started. My next design if I do so will utilize a centrifugal clutch. If you plan to add a clutch, you can get a nice #35 11T 5/8" bore centrifugal clutch from COMET for about $20.00. Look online for go-kart suppliers.
Braking System - Definitely need one. My fourth revision will include one which is a SHIMANO road bike brake caliper with the control put on the throttle bar.
Drivetrain Offset - Also, make sure when the board isn't loaded that the back wheels of the skateboard are off the ground. This ensures that when full load is applied to the skateboard, the drivetrain wheel is weighted sufficiently. This is especially important during push-starting.
Final Demon Board Specifications
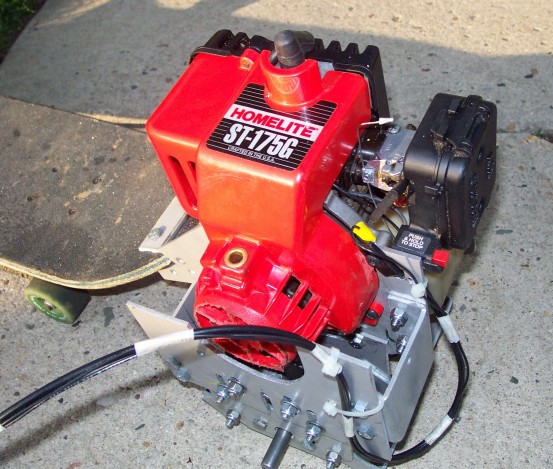
Engine: HOMELITE Weedwacker ST-175G (Size unknown)
Top Speed: 30 MPH (flat ground, 165 pound load)
22 MPH (flat ground, 205 pound load)
Drivetrain:
The following parts list all parts used on the drivetrain. They are available from www.mcmaster.com which is "the" source for mechanical parts in the
United States at least.
9T #35 3/8" Bore Sprocket P/N 6280K111 (Bored at outside machine shop to 7/16" bore size to fit HOMELITE motor shaft)
10T #35 1/2" Bore Sprocket P/N 6280K112
(2) 25T #35 1/2" Bore Sprocket P/N 6236K22
#35 ANSI Roller Chain 3/8" pitch P/N 6261K531
1/2" Collars with set-screws
1/2" Driveshaft with ANSI keyway and keys P/N 6117K31
1/2" Flange Bearings (one for each end of shafts) P/N 5912K43
5" Thermo-Cushion Rubber Wheel 1/2" bore P/N 2829T61
Sheet Metal: 0.100 soft steel
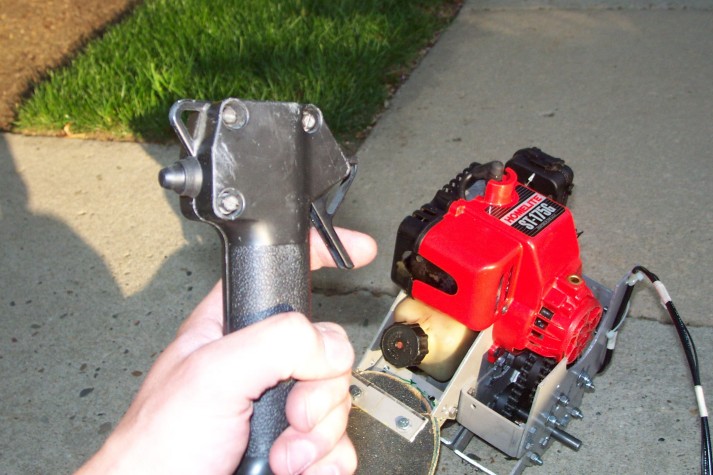
Kill Switch:
Simple Normally Open pushbutton. Note that there is no DeadMan's switch (switch which automatically kills engine when person releases controls.
Engine braking is severe when motor is shut-off while riding throwing rider off.
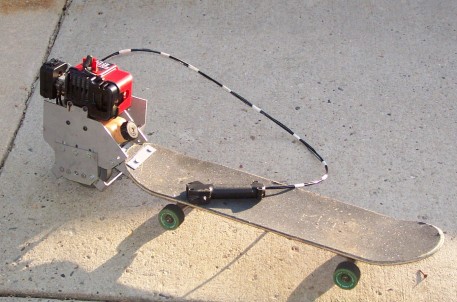
Future Braking System: A future braking system will be implemented using a SHIMANO 600 brake caliper which will grap the 1 inch end of driveshaft sticking
from the assembly chassis. (See pictures)
For additional questions, or pictures, or help, please contact Dan McCauley at liche@snip.net
-Dan McCauley